
For organizers
Create and share a signup
Make a list for one occasion or reuse jobs across a whole schedule.
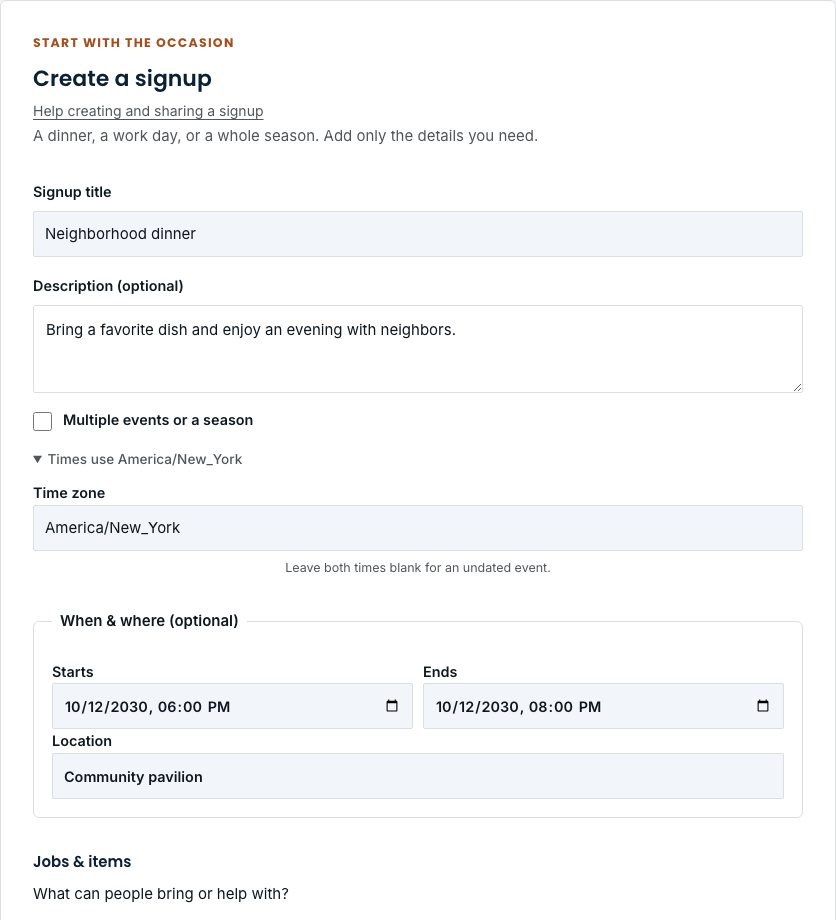
Start with the occasion
- Choose Organize in the navigation. Sign in, or choose Create an organizer account if you are new.
- Before creating an account, use the Terms of Service and Privacy Policy links above the form to review them in a new tab.
- If the Google option is available, you can use it to sign in or create your organizer account. Choose the Google account with the same email as your existing verified password account to keep your workspace and signups. Complete any verification steps shown.
- In your workspace, choose New signup. Add a clear Signup title and an optional description explaining the occasion.
- For one event, add a start time, end time, and location if known. Check the time zone under Times use. Leave both times blank for an undated event.
Add several events or import a schedule
- Select Multiple events or a season. Name each event and choose Add event for additional dates. Dates can follow an irregular schedule.
- To import instead, open Paste or import a schedule. Paste CSV or tab-separated text, or choose a CSV file, with columns title,start,end,location. Use dates such as 2030-10-02T18:30, interpreted in the selected time zone.
- Choose Preview schedule, review the events, then choose Add events using the button showing the preview count. A preview alone does not add the events. You can include up to 100 events, and imported files must be no larger than 64 KB.
List the jobs and items
- Name each job or item. Choose Item to bring, Task, or Volunteer shift, and set Quantity to the number of places you need.
- Add instructions that help someone decide what to bring or do. Choose Add job or item to extend the list. Select Offer an optional waitlist if you want people to be able to wait for filled places.
- For multiple events, each job applies to all events by default. Expand Applies to all events to choose specific dates. If you turn off Apply to all events, select at least one event.
Publish and share
- Leave Publish now and get a shareable link checked when you are ready, then choose Create signup.
- To save a draft, uncheck that option before creating. Open the saved signup from your workspace and choose Publish signup when ready.
- Choose Open public signup on the coverage board. Copy that page’s address and send it to your group. One public link covers every event in the signup.